Why You’ll Love This Chicken Katsu Recipe
If you’re craving something crispy and delicious, you’ll absolutely love this Chicken Katsu recipe. The first bite delivers a satisfying crunch, thanks to the panko breadcrumbs, while the juicy chicken inside makes it irresistible.
I appreciate how simple it’s to prepare and how it brings a taste of Japan right to my kitchen. Plus, you can customize it with your favorite dipping sauces, whether it’s a tangy Katsu sauce or a sweet chili.
It’s perfect for a quick dinner or a fun weekend treat. Trust me, once you try it, you’ll be hooked!
Ingredients of Chicken Katsu
When it comes to making Chicken Katsu, gathering the right ingredients is key to achieving that perfect crunch and juicy flavor. Don’t worry, the list isn’t overwhelming, and you probably have some of these items lying around in your kitchen.
Let’s get into it, shall we? Here’s what you’ll need to whip up this delightful dish:
- 2 lbs boneless, skinless chicken thighs
- 1/2 teaspoon salt (or to taste)
- 1/2 teaspoon white pepper (or to taste)
- 1/2 teaspoon garlic powder
- 1 egg
- 1/2 cup milk
- 1/2 lb panko breadcrumbs (these are the magic ingredient for that crunchy texture)
- 1 quart canola oil (great for frying)
- 1/4 cup ketchup (for a little sweetness)
- 1/2 cup Worcestershire sauce (adds a nice tang)
- 2 tablespoons soy sauce (for some umami goodness)
- 2 dashes Tabasco sauce (if you’re feeling a bit spicy)
- 1/4 teaspoon pepper (or to taste)
Now, let’s chat about a few considerations when it comes to these ingredients. First off, chicken thighs are my go-to for this recipe because they stay moist and tender, unlike chicken breasts that can dry out faster.
You can also switch up the seasonings to suit your taste. Do you love garlic? Add a bit more garlic powder. Are you a spice lover? Go ahead and crank up that Tabasco!
And let’s not forget about the panko breadcrumbs – they’re essential for that crispy coating. They’re coarser than regular breadcrumbs, which means they give you that irresistible crunch.
How to Make Chicken Katsu
Alright, let’s plunge into making this delicious Chicken Katsu. First things first, you’ll want to take your 2 pounds of boneless, skinless chicken thighs and trim off any excess fat. Nobody likes a chewy piece of fat ruining their crunchy chicken experience, right?
Once trimmed, filet those thighs into uniform pieces, about ½ inch thick. This helps them cook evenly, so you won’t end up with one piece that’s overcooked while another is still a bit raw.
Now, in a large bowl, mix ½ teaspoon of salt, ½ teaspoon of white pepper, and ½ teaspoon of garlic powder. Toss those chicken pieces in, making sure they get a good coating of seasoning. It’s like giving your chicken a little spa treatment.
Next up, let’s prepare our breading station. Grab a 9×13 pan and whisk together 1 egg and ½ cup of milk to create a lovely egg wash. In another pan, place some flour and your ½ pound of panko breadcrumbs. The panko is essential here; it’s what gives the Chicken Katsu that amazing crunch.
Now, here comes the fun part—breading the chicken. Take a piece of chicken, dust it lightly in flour, dip it in the egg wash, and then press it into the panko breadcrumbs. Make sure to cover it completely, and don’t be shy about pressing down a bit. This is where the magic happens!
Once breaded, place those beauties on a clean sheet tray, and if you’re stacking them, a little wax paper in between will save you from a sticky mess later.
Now, heat up a quart of canola oil in a heavy 10-inch pot until it reaches 325 degrees. This is the perfect temperature for frying. If you’re like me and the thought of hot oil makes you a tad nervous, just remember: patience is key.
Fry the chicken in batches, about 5 minutes per batch, until they’re a gorgeous golden brown. You may want to test the first piece for doneness because nobody wants to bite into raw chicken.
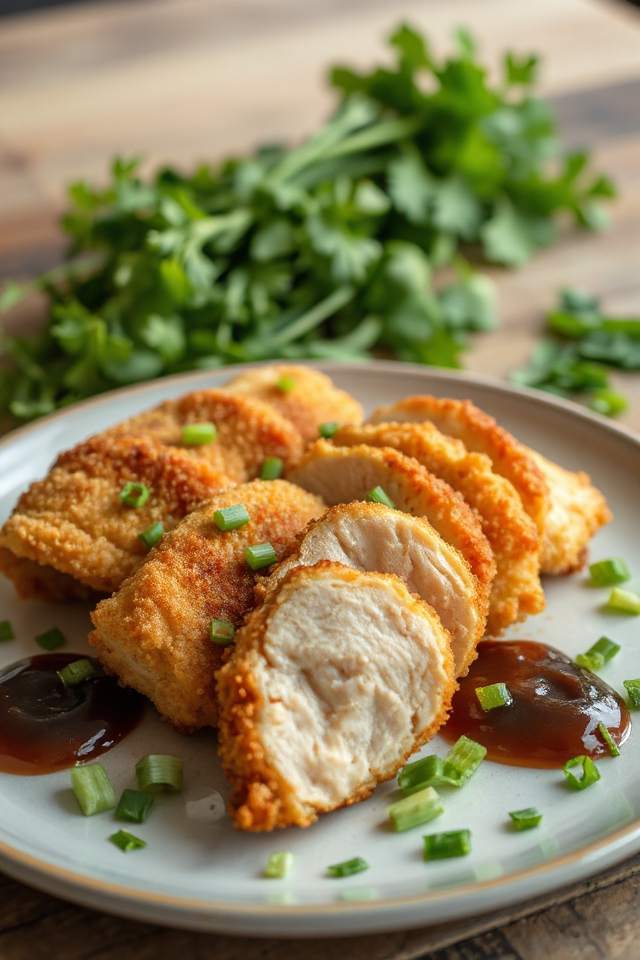
Once cooked, drain the chicken on paper towels or a rack—you want to keep that crunch intact. After they’ve rested a bit, slice them into strips, and voilà! You’ve just made Chicken Katsu.
Serve it with your favorite dipping sauce, and enjoy the fruits of your labor. Just remember, if you accidentally eat an entire piece before serving, it’s totally okay. We all do it.
Chicken Katsu Substitutions & Variations
After mastering the classic Chicken Katsu, you might want to switch things up a bit. I love using pork or tofu for a fun twist on the traditional recipe.
For a healthier option, try baking instead of frying; just spray the breaded pieces with oil and pop them in the oven. You can also experiment with different seasonings in the panko, like adding sesame seeds or spices for extra flavor.
If you’re feeling adventurous, serve it with a spicy mayo or curry sauce instead of the usual katsu sauce. There’s really no limit to the variations you can try!
Additional Tips & Notes
To guarantee your Chicken Katsu turns out perfectly, I recommend paying attention to the temperature of the oil while frying.
If it’s too hot, the coating will burn before the chicken cooks through; if it’s too cool, you won’t achieve that crispy texture. Use a thermometer for accuracy.
Also, let the chicken rest for a few minutes after frying to keep it juicy.
For added flavor, consider marinating the chicken in soy sauce and garlic for an hour before breading.
Finally, serve your Katsu with a tangy sauce to balance the richness of the fried chicken. Enjoy!