Why You’ll Love This Buttermilk Fried Chicken Recipe
When you sink your teeth into this buttermilk fried chicken, you’ll instantly understand why it’s a favorite in my kitchen.
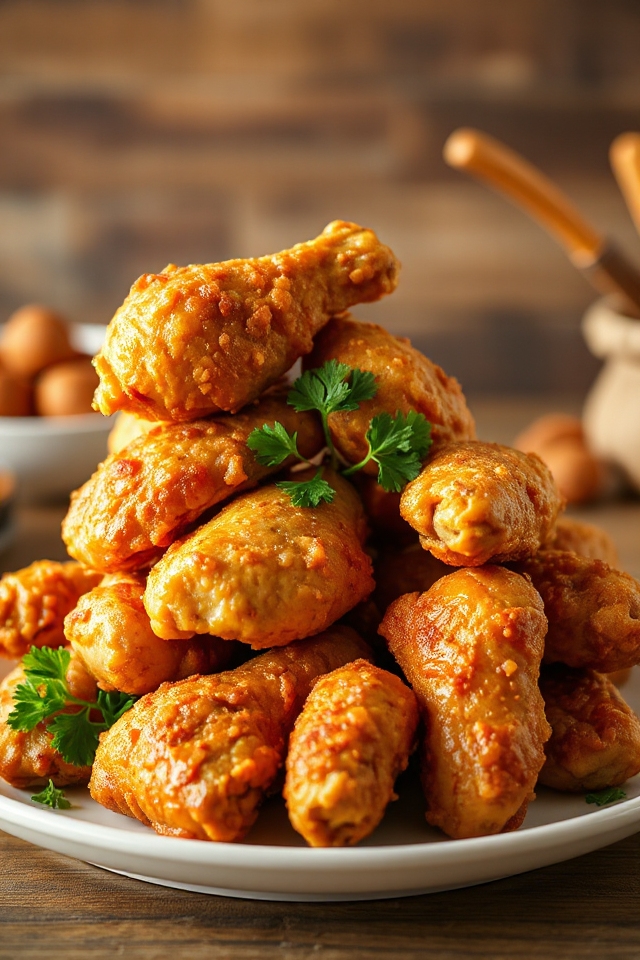
The crispy, golden crust gives way to juicy, tender meat that’s bursting with flavor. Each bite is a delightful combination of spices that dance on your palate, making it hard to resist just one more piece.
Plus, the buttermilk marinade guarantees every morsel is moist and succulent.
I love serving it with my favorite sides for a comforting meal that brings everyone together.
Trust me, once you try this recipe, you’ll be smitten too!
Ingredients of Buttermilk Fried Chicken
Alright, let’s plunge into the delicious world of Buttermilk Fried Chicken. If you’re anything like me, the thought of crispy, golden-brown chicken just makes your mouth water. It’s like a warm hug on a plate, isn’t it?
So, before we get into the nitty-gritty of cooking, let’s gather the magic ingredients that will turn that humble chicken into a feast fit for a king (or queen)!
Here’s what you’ll need to whip up this mouthwatering dish:
- 1 broiler-fryer chicken, cut into 8 pieces (skin on, please—trust the process)
- 2 cups low-fat buttermilk (the secret to juicy chicken)
- 2 tablespoons kosher salt (seasoning is key)
- 2 tablespoons Hungarian paprika (for that rich color and flavor)
- 2 teaspoons garlic powder (who doesn’t love garlic?)
- 1 teaspoon cayenne pepper (for a little kick)
- 1 cup flour (for that crispy coating)
- Vegetable shortening (for frying, because we want that perfect crunch)
Now, let’s chat about the ingredients a bit. When it comes to chicken, I always recommend going for a whole bird cut into pieces rather than pre-packaged parts. Not only does it save you some bucks, but you also get a variety of juicy bits.
And don’t even think about skimping on the buttermilk! It tenderizes the meat, making it incredibly succulent. Plus, the spices? They really elevate the flavor game. If you want to switch things up, you can experiment with different spices or even add some herbs to the mix.
Just remember, the goal here is to create that perfect balance of crispy, juicy, and oh-so-flavorful chicken that will have everyone begging for seconds (or thirds).
Ready to roll up your sleeves and get cooking? Trust me, your taste buds are in for a treat!
How to Make Buttermilk Fried Chicken
Alright, let’s get down to the fun part—making that Buttermilk Fried Chicken! First off, have you marinated your chicken yet? If you haven’t, you’ll want to start by placing 1 broiler-fryer chicken, cut into 8 pieces, into a plastic container.
Then, cover those pieces with 2 cups of low-fat buttermilk. The buttermilk is your secret weapon, tenderizing the chicken and infusing it with moisture. Cover it up and let it hang out in the fridge for 12 to 24 hours. I know, waiting can be the hardest part, but trust me, it’s worth it. Just think of all the crispy goodness that’s coming your way!
Once your chicken is ready and you’re practically drooling, it’s time to season. Drain the chicken in a colander, and while it’s draining, whip up your spice mix: combine 2 tablespoons of kosher salt, 2 tablespoons of Hungarian paprika, 2 teaspoons of garlic powder, and 1 teaspoon of cayenne pepper in a bowl.
Now, here’s a little tip: season the chicken pieces liberally with this mixture before dredging them in 1 cup of flour. This way, you’re trapping that flavor underneath the crispy coating. Shake off any excess flour—nobody likes a floury mess.
Next up, it’s frying time. Melt enough vegetable shortening in a 12-inch cast iron skillet or heavy fry pan to come about 1/8-inch up the sides. Heat it over low until it’s a liquid, then crank up the heat to 325 degrees F.
If you’re like me and have a tendency to get distracted, you might want to set a timer or keep an eye on your thermometer—burnt oil isn’t a good look. Carefully place the chicken skin side down into the pan. Try to place the thighs in the center (they take a bit longer to cook), and arrange the breast and legs around the edge.
Let those bad boys cook until they’re golden brown on each side, around 10-12 minutes. Be patient here; the aroma will be irresistible, but resist the urge to sneak a taste until it’s done.
Once they’re cooked to a perfect 180 degrees internally, drain them on a rack over a sheet pan—no paper towels allowed, please. And if you need to hold them for a bit, cover loosely with foil. There you have it, crispy, juicy Buttermilk Fried Chicken ready to be devoured!
Buttermilk Fried Chicken Substitutions & Variations
Now that you’ve mastered the art of making Buttermilk Fried Chicken, you might be curious about how to mix things up or cater to different tastes.
For a spicy kick, try adding more cayenne pepper or some hot sauce to the buttermilk. If you’re feeling adventurous, use a mix of flours—like cornmeal or almond flour—for a different texture.
You can also substitute the buttermilk with yogurt or a dairy-free alternative for a lighter option. Experiment with seasonings like herbs or lemon zest to create your own signature flavor.
The possibilities are endless, so have fun with it!
Additional Tips & Notes
Although you’ve got the basics down, there are a few extra tips that can elevate your buttermilk fried chicken to the next level.
First, let the chicken rest for 10-15 minutes after frying; this helps retain its juiciness. If you want extra crunch, double-dip by repeating the flour dredge after the first fry.
Don’t skip the seasoning on the chicken before flouring—it truly makes a difference!
Finally, frying in batches helps maintain oil temperature, ensuring even cooking. Remember, patience is key!
Trust me, these small tweaks can turn your fried chicken into a show-stopper everyone will rave about.